Spring is here, and April is National Poetry Month, so what better time to have your students work on their creative writing skills with a Springtime-themed writing activity.
The End of Eng. 12, 2018
Student Blog Challenge Champions
Eng.12 Student Blogging Challenge Totals
Week 5 Blog Challenge Period 6
Week 5 Challenge – 4th Period
Week 5 Blog Challenge – 1st Period
Week 5 Student Blogging Challenge
All About Quotes
The more that you read, the more things you will know. The more that you learn, the more places you’ll go.
~Dr. Seuss
Have you ever tried adding a quote to your blog post? A quote is simply where you write someone else’s words.
You might use quotes from:
- well known people
- books or movies
- other bloggers
- your teachers or friends
Reasons To Use Quotes:
- You can back up your thoughts and make your writing more credible (that means true or believable).
- The readers of your posts can get new ideas by hearing from others.
- A quote can be an interesting way to start or end your blog post.
- You can learn a lot from researching quotes.
How Do You Put A Quote In Your Post?
You can just type your quote into a post and put it in quotation marks, but to really make it stand out and break up your text, try blockquotes.
Using blockquotes is easy. Below are the instructions for Edublogs.
When you’re in your visual editor:
- type the quote
- highlight the words in your quote
- click on the quotation mark icon
 It will then display like this…
You’re braver than you believe, and stronger than you seem, and smarter than you think. ~A.A. Milne
Note: The way the blockquotes display depends on your theme.
Where Can You Find Quotes?
You might already have some favorite quotes stored in your memory.
You might do a Google search for articles on your topic and find quotes from others.
You might browse your favorite blogs or books for quotes.
There are some online collection of quotes such as GoodReads Quotes and LitQuotes (Note: these aren’t designed for children so we recommend only teachers or older students use these sorts of sites).
Using Quotes The RIGHT way
We know we can’t just take images that we find online, and we certainly can’t copy others’ writing and publish it as our own. So, many people might wonder about using quotes.
It’s fine to use quotes from others but there are a few things to be aware of:
- Make it obvious which words are your own, and which words belong to someone else (you do this by using quotation marks or block quotes).
- Make your quotes brief. Perhaps a few sentences. Never copy the whole post.
- Always include the person’s name (also link to their site, article, or book if you can).
- If you’re using blockquotes, the attribution could be before the quote, inside it, or below it.
- If you shorten a quote, use an ellipsis (…) in place of the missing words.
- If you’re adding any words or corrections to the quote, use brackets.
Your Weekly Activity
Now you know a little about the how and why of using quotes, it’s time to get creative! This week we are back to one activity for each class period – however, everyone in the class must be included in the activity for the class to get any credit. Each class period will:
Make a post full of quotes
Create a blog post that is a compilation of quotes.
Quote other students
Interview the students in your class period and include their quotes in a blog post. This is where you provide evidence that everyone in your class period has been involved.
You could choose a specific topic to interview students about.
For example:
- most important advice to upcoming seniors
- a special thank you to a favorite teacher
- something you always wanted to say to a fellow student
- favorite things to do at lunchtime
- best places to play around your town
- reasons why your school is great
Make Your Quotes Visual
One or more of the quotes on this week’s challenge post must be a visual quote or the whole post can be a compilation of visual quotes.
There are many ways to add quotes to an image. You can do this offline using a program like PowerPoint, Keynote or Paint.
There are also many online tools for turning your quote into an image. Some of these include:
Don’t forget to add the image you create to your blog post.
Each class period must have their completed post sent to Mrs. Scales by the end of their class period next Friday – April 20th.
Week 4 Student Blogging Challenge
Running Totals after 3 weeks of competition:
1st period 5 pts.
4th period 7 pts.
6th period 6 pts.
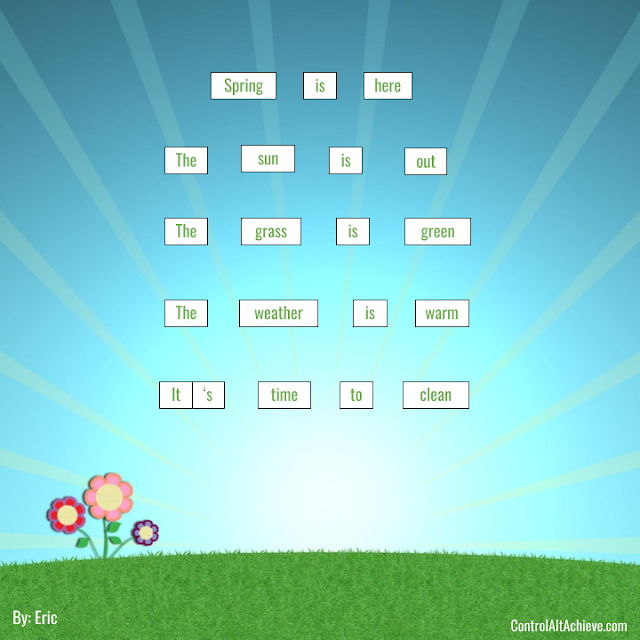
Springtime Magnetic Poetry with Google Drawings
Doing this activity with technology such as Google Drawings provides many benefits:
- No limit on the quantity of words provided. Just copy and paste more of them as needed.
- Great tech skills practice with dragging and dropping and copying and pasting.
- Ability to edit the words provided if needed.
- Ability to add your own words.
- Easy collaboration with others.
- Easy to share or download your final creation.
- No pieces to get lost.
- It’s free!
See below to get your free copy of the Springtime Magnetic Poetry template to use for this assignment.
- Springtime Magnetic Poetry Template – Google Drawing link
Template Layout
Here is the basic layout of the template:
Middle
In the middle of the template is the canvas where the students will add the words for their poem, story, greeting card, or creative writing piece. At the bottom of the work area is a text box where the student can type in their name.
Left Side
On the left side of the template are 100 standard (non-themed) words in alphabetical order. These include the typical words needed to create sentences and phrases. I pulled these words primarily from the Dolch Word List, based on the words I felt would be the most familiar, needed, useful, and versatile. In addition to words, this list also includes some word fragments, such as “ed”, “ing”, and such, that can be added to other words to modify them.
Right Side
On the right side of the template are the 78 Springtime-themed words in alphabetical order. I tried to include a variety of words related to Spring, but if you need more there are also some blank tiles of various sizes at the bottom that can be used to type in your own words as needed.
By laying out the template this way, students are able to see all of the words at once, and quickly find the words they want to use.
Using the Template
Once you have your own copy of the template, you and your students can create your poem or other writing as follows:
- Drag and drop words from the left and right sides onto the middle work area. Drag around the words as needed to place them where you want.
- If you need more than one copy of a word, simply copy and paste it. You can select the text box for the word, then choose “Edit” and “Copy” and “Paste”, or right click and “Copy” and “Paste”, or press Ctrl-C and Ctrl-V.
- If you need to edit an existing word, just double-click inside the text box and make the changes you want, such as capitalizing the word, changing the tense, making it plural, or such.
- Note: If you change an existing word so that the new word is longer, you will likely need to click and drag the edge of the text box to make it bigger to contain the new word.
- If you want to add your own words, double-click inside of any of the blank text boxes and type in the word you want.
Sharing your creation
When you are all done (or at any point in the process) you can share your Google Drawing using the blue “Share” button just like any Google file.
However, another option when done is to download your creation as an image. This will allow you to take that image and use it in many ways:
- Print it out.
- Insert it into a Google Doc or a Google Slideshow.
- Post it on your blog or class website.
- Share it on social media such as Twitter, Facebook, or Instagram.
- Make a greeting card out of it by putting into a desktop publishing program or even a Google Drawings greeting card template.
To download an image version of your Google Drawing, do the following:
- Click “File”
- Choose “Download as”
- Select “PNG image (.png)”
- Google Drawings will only download the work area of the Drawing, not the word banks on the left and right sides of the main canvas.
- Your image will now be downloaded and ready to use.
Instructions provided by Eric Curts blog post on WEDNESDAY, APRIL 4, 2018, Control Alt Achieve: transforming education with technology Springtime Magnetic Poetry
Period 6 – Week 3 Blogging Challenge
How you ever known you could do something great but were never given the changes? This was Geophphery Giraffes problem everyday as he sat in the stands of the horse races. He knew that he was not only good enough to compete, but to win.
Leaving the races that afternoon, Geophphery bumped into Hunter Horse, the top runner, and Evelyn Elephant, the host of the races. Geophphery expressed his craving to be in the races and they immediately laughed as if he were joking. After realizing Geophphery wasn’t laughing, Evelyn offered him a spot in the races as her own personal joke.
The next day at the races Geophphery preparing himself for the opportunity of a lifetime. He was running alone but heard the jockeys telling their horses to get ready and giving them tips. He closed his eyes and listened to their words words carefully. Hunter and his jockey were going to find a way to get rid of Geophphery. BANG! The gun fired, the stall door opened, and they were on the run…..

